

[AWS에 Spring 초간단 배포하기] Nginx, Let's Encrypt를 사용한 HTTPS 설정

안녕하세요? 제이온입니다.
초보자를 대상으로 하는 [AWS에 Spring 초간단 배포하기]의 다섯 번째 시간은 HTTPS 설정입니다. 이전 1~4편 내용을 모두 따라오셨다고 가정하고 진행하겠습니다.
Nginx
Nginx는 웹 서버 중 하나로 톰캣과 같은 WAS 앞단에 위치하여 리버스 프록시 서버 역할을 할 수 있습니다. 대표적으로 로드밸런싱, 포트 포워딩, SSL 설정 등이 있습니다. 이번 포스팅에서는 Nginx를 활용하여 SSL 설정을 해 보겠습니다.
세팅
$ sudo apt-get install -y nginx nginx-common nginx-full위 명령어로 nginx를 설치합니다.
포트 포워딩
이전 포스팅에서는 iptables을 사용하여 포트 포워딩하였는데, nginx 단에서 80번 포트가 들어오면 8080번 포트로 포워딩하는 방식으로 수정하겠습니다.
$ sudo iptables -t nat -L --line-numbers
Chain PREROUTING (policy ACCEPT)
num  target     prot opt source               destination
1    REDIRECT   tcp  --  anywhere             anywhere             tcp dpt:http redir ports 8080

Chain INPUT (policy ACCEPT)
num  target     prot opt source               destination

Chain OUTPUT (policy ACCEPT)
num  target     prot opt source               destination

Chain POSTROUTING (policy ACCEPT)
num  target     prot opt source               destination

$ sudo iptables -t nat -D PREROUTING 1

$ sudo iptables -t nat -L --line-numbers
Chain PREROUTING (policy ACCEPT)
num  target     prot opt source               destination

Chain INPUT (policy ACCEPT)
num  target     prot opt source               destination

Chain OUTPUT (policy ACCEPT)
num  target     prot opt source               destination

Chain POSTROUTING (policy ACCEPT)
num  target     prot opt source               destination
$ sudo iptables -t nat -L --line-numbers 을 통해 포트 포워딩 관련 정책의 번호를 확인하고, sudo iptables -t nat -D PREROUTING 1 을 통해 포트 포워딩 관련 정책을 제거하면 됩니다.
$ sudo vi /etc/nginx/nginx.conf

user www-data;
worker_processes auto;
pid /run/nginx.pid;
include /etc/nginx/modules-enabled/*.conf;

events {}

http {
  upstream app {
    server 127.0.0.1:8080;
  }

  server {
    # 80번으로 요청이 오면, localhost의 8080번 포트로 연결해 준다는 의미입니다.
    listen 80;

    location / {
      proxy_pass http://app;
    }
  }
}
그리고 위와 같이 nginx.conf로 이동하여 포트 포워딩 코드를 작성해 줍니다.
$ sudo service nginx restart
이후 nginx 서비스를 재시작하면 됩니다.

성공적으로 포트 포워딩된 것을 확인할 수 있습니다.
SSL 설정
HTTPS 프로토콜은 SSL 프로토콜로 암호화한 HTTP 프로토콜이라고 생각하면 됩니다. SSL 프로토콜을 적용하기 위해서는 SSL 인증서를 발급 받고, 이 인증서를 웹 서버에서 적용하는 과정이 필요합니다.
무료 인증서 발급
# 저장소 업데이트 및 공용 시스템을 설치
$ apt-get update -y
$ apt-get install software-properties-common -y

# Certbot을 설치
$ apt-get install certbot -y
우선 SSL 인증서를 발행할 수 있는 툴인 Certbot을 설치합니다.
$ sudo certbot certonly -d [도메인 주소] --manual --preferred-challenges dns
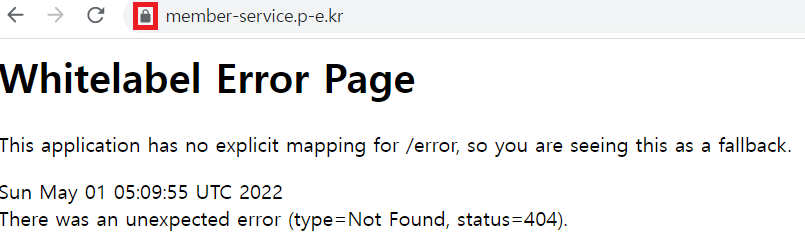
SSL 인증서를 발급 받기 위해 위 명령어를 입력합니다. 이때 도메인 주소는 member-service.p-e.kr와 같이 자신의 도메인 주소로 변경하여 작성해야 합니다.
Saving debug log to /var/log/letsencrypt/letsencrypt.log
Plugins selected: Authenticator manual, Installer None
Enter email address (used for urgent renewal and security notices) (Enter 'c' to
cancel): basejin0810@naver.com
본인의 이메일 주소를 작성하고 엔터를 누릅니다.
Please read the Terms of Service at
https://letsencrypt.org/documents/LE-SA-v1.2-November-15-2017.pdf. You must
agree in order to register with the ACME server at
https://acme-v02.api.letsencrypt.org/directory
- - - - - - - - - - - - - - - - - - - - - - - - - - - - - - - - - - - - - - - -
(A)gree/(C)ancel: A
약관을 동의해야 하니 A를 입력하고 엔터를 누릅니다.
Would you be willing to share your email address with the Electronic Frontier
Foundation, a founding partner of the Let's Encrypt project and the non-profit
organization that develops Certbot? We'd like to send you email about our work
encrypting the web, EFF news, campaigns, and ways to support digital freedom.
- - - - - - - - - - - - - - - - - - - - - - - - - - - - - - - - - - - - - - - -
(Y)es/(N)o: N
이메일로 정기 간행물을 받겠냐는 알림인데, 원하시면 Y를 작성하고 그렇지 않으면 N을 작성하고 엔터를 누릅니다.
NOTE: The IP of this machine will be publicly logged as having requested this
certificate. If you're running certbot in manual mode on a machine that is not
your server, please ensure you're okay with that.

Are you OK with your IP being logged?
- - - - - - - - - - - - - - - - - - - - - - - - - - - - - - - - - - - - - - - -
(Y)es/(N)o: Y
IP 로깅을 허용하기 위해 Y를 입력하고 엔터를 누릅니다.
Please deploy a DNS TXT record under the name
_acme-challenge.member-service.p-e.kr with the following value:

ifafpjnPLtGJHpknIAmvMUt59Ig1XOmqfvNV-l_2dYI

Before continuing, verify the record is deployed.
- - - - - - - - - - - - - - - - - - - - - - - - - - - - - - - - - - - - - - - -
Press Enter to Continue
여기가 가장 중요합니다. _acme-challenge 은 호스트이고, ifafpjnPLtGJHpknIAmvMUt59Ig1XOmqfvNV-l_2dYI 는 DNS TXT 레코드 값입니다. 우리가 이전에 DNS 세팅하였던 내도메인.한국 으로 이동합니다.

위와 같이 고급설정에서 TXT 레코드를 정확하게 기입합니다. 그리고 난 뒤 EC2 콘솔에서 약 1분 후 엔터를 칩니다.
IMPORTANT NOTES:
 - Congratulations! Your certificate and chain have been saved at:
   /etc/letsencrypt/live/member-service.p-e.kr/fullchain.pem
   Your key file has been saved at:
   /etc/letsencrypt/live/member-service.p-e.kr/privkey.pem
   Your cert will expire on 2022-07-30. To obtain a new or tweaked
   version of this certificate in the future, simply run certbot
   again. To non-interactively renew *all* of your certificates, run
   "certbot renew"
 - If you like Certbot, please consider supporting our work by:

   Donating to ISRG / Let's Encrypt:   https://letsencrypt.org/donate
   Donating to EFF:                    https://eff.org/donate-le
Congratulation! 메시지가 나오면, 성공적으로 SSL 인증서를 발급 받은 것입니다.
SSL 설정
$ sudo vi /etc/nginx/nginx.conf

user www-data;
worker_processes auto;
pid /run/nginx.pid;
include /etc/nginx/modules-enabled/*.conf;

events {}

http {
  upstream app {
    server 127.0.0.1:8080;
  }

  # Redirect all traffic to HTTPS
  server {
    listen 80;
    return 301 https://$host$request_uri;
  }

  server {
    listen 443 ssl;
    ssl_certificate /etc/letsencrypt/live/[도메인 주소]/fullchain.pem;
    ssl_certificate_key /etc/letsencrypt/live/[도메인 주소]/privkey.pem;

    # Disable SSL
    ssl_protocols TLSv1 TLSv1.1 TLSv1.2;

    # 통신과정에서 사용할 암호화 알고리즘
    ssl_prefer_server_ciphers on;
    ssl_ciphers ECDH+AESGCM:ECDH+AES256:ECDH+AES128:DH+3DES:!ADH:!AECDH:!MD5;

    # Enable HSTS
    # client의 browser에게 http로 어떠한 것도 load 하지 말라고 규제합니다.
    # 이를 통해 http에서 https로 redirect 되는 request를 minimize 할 수 있습니다.
    add_header Strict-Transport-Security "max-age=31536000" always;

    # SSL sessions
    ssl_session_cache shared:SSL:10m;
    ssl_session_timeout 10m;

    location / {
      proxy_pass http://app;
    }
  }
}
nginx.conf를 열어서 위와 같이 입력합니다. 중간에 도메인 주소만 본인 도메인 주소로 바꾸면 됩니다.
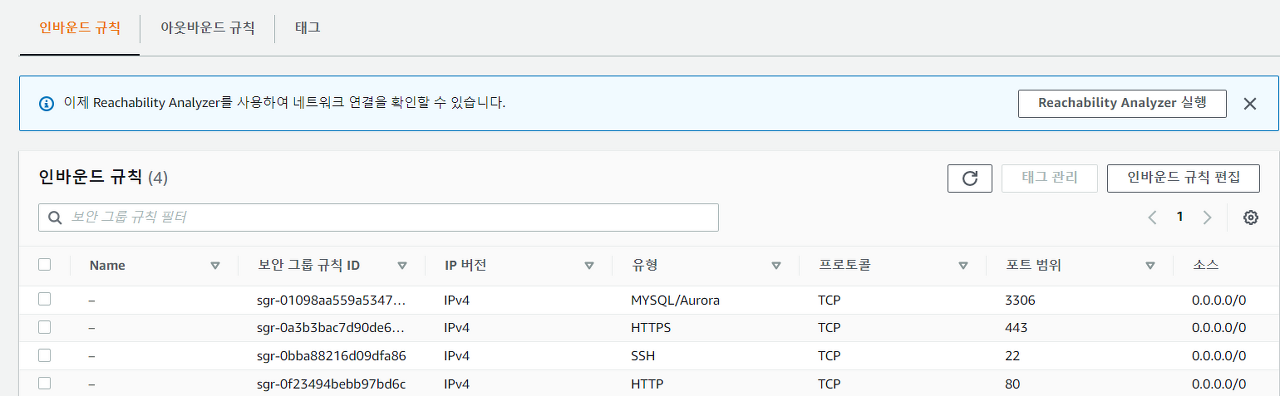
그리고 EC2 보안 그룹의 인바운드 규칙에서 443번 포트를 열어야 합니다. 443번 포트는 HTTPS 프로토콜의 기본 포트입니다.
http로 요청을 보내도 자동으로 https로 변경되어 요청이 가는 것을 확인하실 수 있습니다. 이것은 요청이 스프링까지 오기 전에 nginx 단에서 80번 포트를 443번 포트로 포워딩을 하고, 443번 포트에 대해 SSL 프로토콜을 적용하였기 때문에 가능한 일입니다.
인증서 자동 갱신
Let’s encrypt는 무료 인증서인 것은 참 좋지만, 3개월마다 인증서를 갱신해야 한다는 단점이 있습니다. 이것은 linux의 crontab 명령어를 사용하여 자동으로 인증서를 갱신해 줄 수 있습니다.
$ sudo vi /etc/crontab
위와 같이 crontab 설정 파일을 엽니다.

해당 화면에서 맨 아래 줄에 다음 명령어를 입력하고 저장하면 됩니다.
15 3 * * * certbot renew --quiet --renew-hook "/etc/init.d/nginx reload"
3개월마다 인증서를 자동 갱신한다는 의미입니다.
정리
무료 인증서를 발급 받고, Nginx에 포트 포워딩 및 SSL 프로토콜을 적용하여 HTTPS를 설정하였습니다. HTTPS는 보안 외에도 검색엔진 최적화(SEO)를 위해서도 꼭 필요한 설정이니 이번 기회에 잘 세팅하시길 바랍니다.
'개발 이야기 > 인프라' 카테고리의 다른 글
| [K6] Spring, Postgresql 모니터링 가이드 with gRPC (0) | 2023.09.02 |
|---|---|
| [K6] K6 세팅 가이드 with gRPC (0) | 2023.03.17 |
| [AWS에 Spring 초간단 배포하기] DNS 설정 (0) | 2022.04.30 |
| [AWS에 Spring 초간단 배포하기] SSH 접속 및 Spring 배포 (0) | 2022.04.30 |
| [AWS에 Spring 초간단 배포하기] RDS 설정 (0) | 2022.04.30 |
댓글